
Assignment 06 - Ptex, Mari, RenderMan (Updated)
18 Oct 2018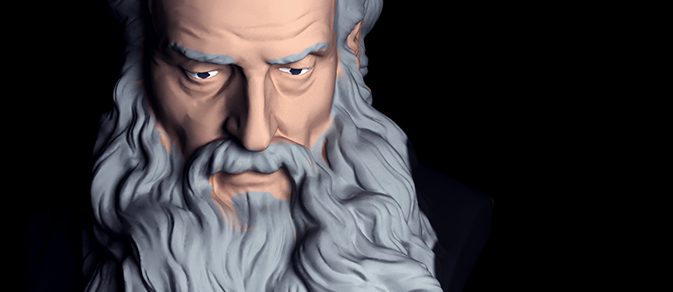
For this assignment the goal is to switch to a production renderer (RenderMan RIS – preferably version 22), use Ptex as an alternative form of texture mapping, try Mari for texture painting, and practice a bit of lighting (which heavily impacts rendering and shading). Ptex was developed at Disney in an effort to surface complex models without the need for manual texture layout. Mari was originally developed at Weta Digital with the goal of painting large-scale, high-resolution texture maps for feature-VFX assets. RenderMan as a name dates back decades to Pixar’s early developments for rendering using the REYES algorithm, and the technology has been used for a myriad of films in the time since. The most recent RenderMan was drastically re-architected (RIS) in recent years, however, to use path-tracing with the flexible choice for integrators and BxDFs, and it is one of the premier path-tracing production renderers in use currently in feature animation and VFX. (The trend for path-tracing has grown in recent years, and we’ll explore this more as well as discuss other rendering solutions.)
Read over the Eurographics paper that introduced Ptex in 2008. Bolt was the first film completely textured with a Ptex workflow at Walt Disney Animation where Ptex was developed.
RenderMan 21 Note: Choose RenderMan->Advanced RenderMan Controls (from the main RenderMan menu added to the Maya menu bar when the RenderMan for Maya plug-in is loaded); Under the window that appears, choose View->Geometric Settings. Add these two attributes: “Bake Context” and “Ptex Face Offset”. Make sure to attach to your model by selecting and choosing the attach button. Under Hypershade, connect a “PxrPtexture” output (such as combined RGB) to the input (such as diffuse color) on your PxrSurface node that you wish your painted channel to control.
RenderMan 22 Note: Add a PxrPtexture node and a PxrSurface node under Hypershade in Maya. Make sure you have a Pixar light in your scene (can change the viewport in your working panel to use RenderMan in 22). Connect the output (such as combined RGB) from the PxrPtexture node (where you point the file option to your .ptx file with any-extension chosen). Choose your mesh; under the attribute editor, look for the RenderMan options under the shape node tab for your mesh. Look for the Ptex section and enable `emit face IDs.’
Objectives:
- Choose a model with a face from Scan the World.
- Choose an art direction (realistic or stylized). Base this and communicate it through choice of reference photos, a paint over, or other concept paintings. Your goal is to match this.
- Use MeshLab or other to convert from stl to obj format. (Maya 2018 can directly import stl, so skip MeshLab). Rotate by 270-degrees on X-axis for convenience.
- Reduce and/or smooth model in Maya, if desired (perhaps test with a few quick renders before deciding and passing on to Mari). You may find you have the best luck / computer speed by reducing fairly significantly. (I took my example mesh to 20k polys with the guarantee-count option. I also smoothed it, ran some mesh clean-up options to be sure, and also switched the normals to per face and did some other options such as average and soften-edge to smooth the appearance a bit more under the normal display to counter some odd effects of the normals from the reduced scanned mesh.)
- Quadrangulate for better Ptex workflow. Export to obj again for mesh setup in Mari. (I actually found triangles are working well now – I would recommend them, as you may have issues reducing and keeping clean quads from the scans).
- Use Mari with a PTEX workflow to paint surface textures.
- Paint maps to render your mesh as closely to your art concept as you can.
- Complete a three-point lighting setup. Using that three-point lighting setup, complete multiple setups that include split lighting, loop lighting, Rembrandt lighting, and butterfly lighting.
- Choose one of split, loop, or Rembrandt to demonstrate in two more renders as broad or short.
- Complete at least one render with an HDR light probe (some nice free ones here.)
- Choose your favorite lighting set and render a turntable of the bust within that setup. (Render the stills at a higher resolution, but for time, you may wish to render the turntable at a lower resolution and number of samples).
- Some suggested extensions: portfolio-level quality, more advanced lighting and/or rendered movies, re-surfaced a second time to appear as much like a human face as possible (investigating SSS shaders in RenderMan) and rendered with some of your favorite lighting setups.
In either choice include screenshots of work in progress, still images and videos of final renders, and a short pdf description of what you did in your project. Come Thursday ready to present and critique.