Goal: Create two “ported” shaders from Book of Shaders or other ones that you may have come across or created while working on earlier assignments and a third unique new shader for fun that does something more interesting.
Recall that some things are different between HLSL (DirectX) and GLSL such as vec2 -> float2, etc. There are some “translators” available, but for simple things just a few differences are there and can usually be spotted or found once Unreal tries to compile your code.
Steps:
-
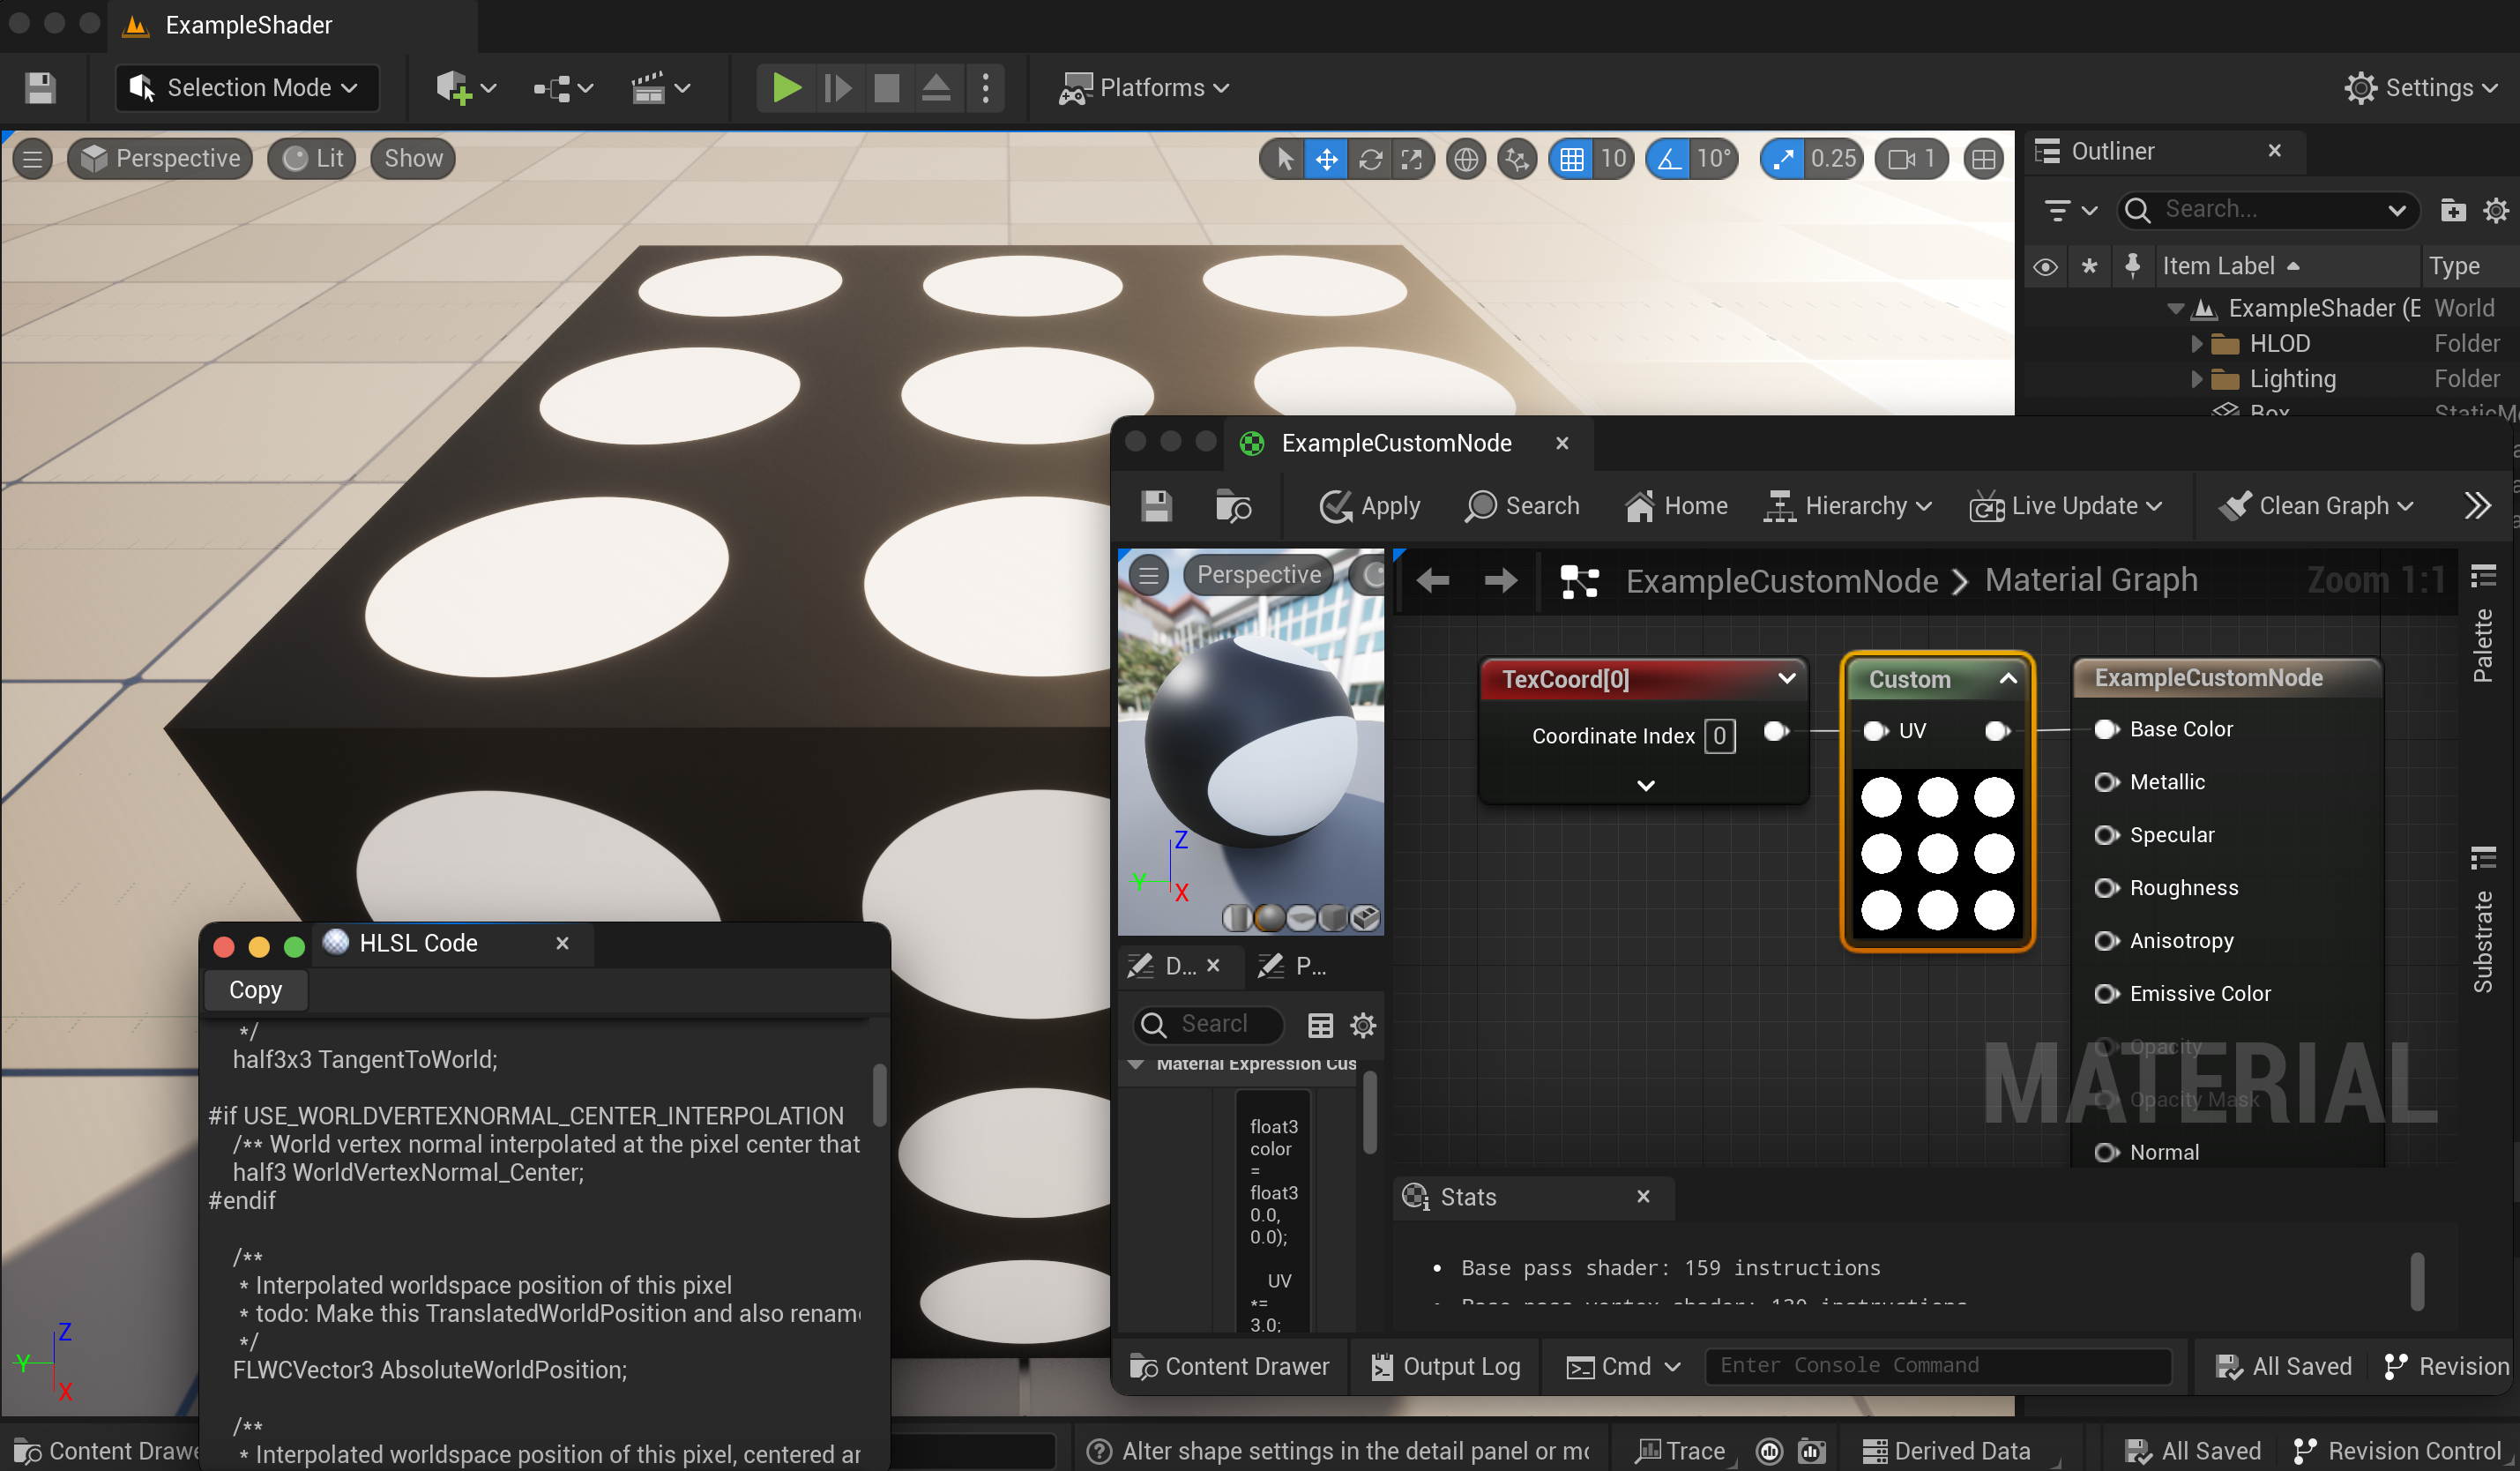
Go into the Content Editor (lower left) and in the Materials folder right-click to create a material. Name it.
-
Double-click the material to enter the material node editor, right-click to make a custom node, and add your code (pasted from another editor, you’ll prefer) into the “code” block. Add and name inputs to match those in your code, remembering not to have a function name and just start using the inputs such as “UV” in my example.
-
Create texture_coord notes to tie to the UV input or whatever else you need from the material nodes. Try to match the first two you port, but be creative on the third shader.
-
Make a box or other to put your material on. (Or 3 boxes or more interesting geometry). To do this, switch from “selection mode” in the upper left (UE 5) and choose modeling to choose a box, then place and “accept.” You can go ahead and set your material here if you’ve made your material first. Otherwise, you’ll have to put your material on the surface later.
You can go under the main UE “Windows” menu and Shader Code to choose HLSL – paste this in another editor and search for something from your code to see where your function gets generated among everything.
Screenshot or create renders showing your material network and your output. Include the code and references to any resources you used in your written PDF description.