This website is preserved for historical and scholarly reference and is no longer actively maintained.
2.3 Creating a New Watch Model
The next step in working with the Watch example is to try to
develop a new watch model. The easiest way to do this is just simply combine an
existing display with an existing logical watch application. However, let us try
something more complex here: a stopwatch-only model with four zones and two
buttons. This requires the building of a real variant with a new display, as
there is currently no display with four zones and two buttons.
First, open the WatchFamily diagram if not opened before
and create a new Display object. Enter the name for the display
(‘X042’ in our example) and add four zones, (you can reuse
‘Zone1’, ‘Zone2’ and ‘Zone3’ from the
existing models by selecting
Add Existing... from the popup menu of
UnitZones list, but you have to create ‘Zone4’ as it is not
available), and two buttons, (you can reuse ‘Up’ and
‘Down’ buttons from previous models). The property dialog for the
display should now look like
Figure 2-6.
Choose
OK and close the dialog.
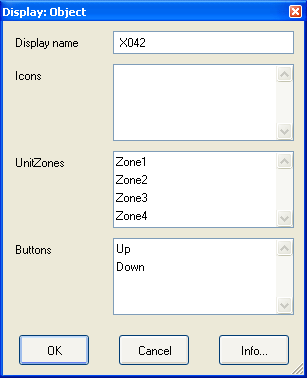
Figure 2-6. Property dialog for the new Display object.
The
next component we need is the logical watch application for our stopwatch. We
can reuse the existing stopwatch sub-application, but we need to repackage it
before we can use it as a logical watch application. In WatchFamily diagram,
create a new LogicalWatch object and attach the existing ‘Stopwatch’
WatchApplication graph as its property. Choose the new LogicalWatch object and
select Decompositions... from its pop-up menu. Accept WatchApplication as
the type of decomposition graph and choose ‘Stopwatch’ from the
following list. The logical watch application has been now defined. Note that
now we are using Stopwatch directly from the LogicalWatch, rather than having a
top-level WatchApplication state diagram in between.
To finalize our new watch model, we need to assemble our
new display and logical watch components as the model. Create a new WatchModel
object in WatchFamily diagram. Enter its name (‘JustStopwatch’ in
our example) and attach our newly created display and logical watch application
as its respective properties. The WatchFamily diagram should now look like
Figure 2-7.
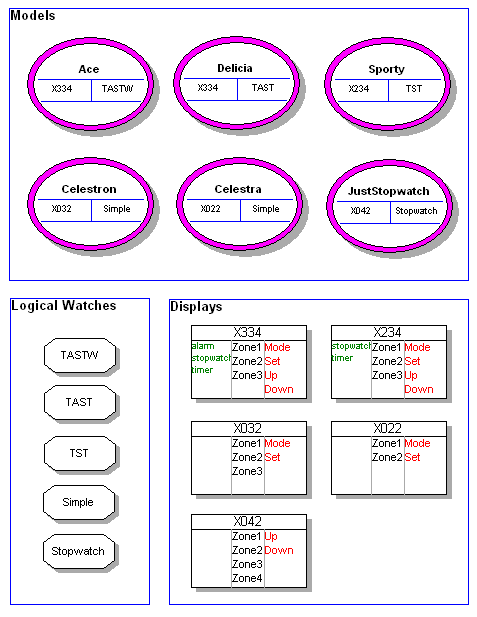
Figure 2-7. The WatchFamily diagram with new objects.


